All Blogs
Shift Left Security in Practice: How to Integrate ZeroThreat’s Pentesting Tool Into CI/CD Pipelines
Quick Overview: Shift-left security becomes effective when penetration testing runs inside CI/CD pipelines, not after release. This blog explains how ZeroThreat’s AI-powered pentesting tool integrates into CI/CD workflows, helping teams detect vulnerabilities early, secure pipelines continuously, and ship faster without threats and downtime.
Security issues slow down the development cycle when teams stop detecting vulnerabilities, and they stack up. Most breaches that happen trace back to vulnerabilities introduced early in development. That’s why shift-left security in CI/CD pipelines is no longer optional for modern engineering teams.
CI/CD pipelines move fast, but traditional security testing still happens late. Manual reviews and post-release penetration testing cannot keep up with continuous delivery. This gap creates security risks, rework, and delays. CI/CD pipeline security must evolve with how software is built today.
Shift-left security brings testing closer to code, builds, and deployments. Security scanning runs inside CI/CD workflows, ensuring every commit made is tested and deployed after that. This approach fits DevSecOps teams that ship frequently. It reduces friction while improving real security outcomes across the pipeline.
This blog explains shift-left security in practice and how ZeroThreat’s AI-driven automated pentesting tool integrates into CI/CD pipelines. It walks through real integration paths, supported platforms, and the practical benefits of shifting security left. With that said, let’s get started!
Stop guessing and start catching critical flaws in your CI/CD pipeline from day 0. Start for FREE
ON THIS PAGE
- What Does Shift-Left Security Mean in CI/CD Pipelines?
- Benefits of Shift-Left Security in CI/CD Pipeline
- Which CI/CD Platforms Does ZeroThreat Integrate With?
- How to Integrate ZeroThreat in Your CI/CD Pipeline?
- Wrapping Up
What Does Shift-Left Security Mean in CI/CD Pipelines?
Shift-left security in CI/CD pipelines means moving security testing earlier into the development lifecycle. Instead of waiting until deployment, security checks start during code commits, builds, and integrations. This helps teams catch vulnerabilities early, when fixes are faster, cheaper, and less disruptive.
In a CI/CD shift-left model, security becomes part of daily development practice, not a final process. Automated security testing and feedback run alongside builds and deployments. This approach strengthens CI/CD pipeline security without slowing delivery or blocking developers.
Shift-left security in practice aligns security, development, and operations into one workflow. It supports DevSecOps by embedding security into pipelines, tools, and processes. That results in more secure CI/CD pipelines, which can scale with organizational needs.
Benefits of Shift-Left Security in CI/CD Pipeline
Implementing security in CI/CD pipelines allows you to shift the security left and identify vulnerabilities when they are easiest and cheapest to fix. It eliminates the stressful, last-minute security misconfigurations that often delay new deployment releases.
The benefits of shifting the security left in the CI/CD pipeline are as follows:
Early Vulnerability Detection
Shift-left security helps teams find vulnerabilities during coding and builds, not after release. That means issues are detected early through security testing in CI/CD pipelines. This results in no risk of Zero-Day vulnerabilities and cuts the time and effort required to fix the security issues.
Faster and More Secure Releases
Integrating security early removes last-minute security delays. Security checks run automatically as part of CI/CD workflows. It ensures that every commit made to the pipeline is tested before it reaches production, reducing security risks.
Lower Fix Costs and Reduced Rework
Fixing security issues earlier is always cheaper than patching production systems. Shift-left security in practice prevents costly cybersecurity reworks later. The development teams can address security bugs in the code when the context is fresh.
Better Collaboration Across DevSecOps Teams
Shift-left DevSecOps brings security, development, and operations closer. Security no longer remains a end of the development project. It rather becomes a continuous practice and a shared responsibility for CI/CD pipeline security.
Scalable Security for Growing CI/CD Pipelines
As pipelines grow, manual security cannot be kept up. Shift-left security tools automate testing across environments. These tools keep track of each code change and deployment, ensuring that CI/CD remains secure and reliable even at scale.
Deploying tonight? Run a high-speed automated pentest before you hit the push button. Pentest Now!
Which CI/CD Platforms Does ZeroThreat Integrate With?
ZeroThreat is designed to be highly versatile, ensuring that security is never an afterthought, regardless of your tech stack. It provides native-like experiences across major platforms to help teams automate AI-powered vulnerability assessment.
Here are the currently available ZeroThreat integrations for CI/CD platforms:
GitLab CI/CD
ZeroThreat connects with GitLab CI/CD to automate security scans directly within your development pipeline. By using the official GitLab CI/CD Catalog, you can easily add a security stage to your .gitlab-ci.yml file. This integration allows you to catch vulnerabilities early and manage them as part of your standard build process.
GitHub Actions
Integrating ZeroThreat into GitHub Actions allows you to trigger automated penetration testing with every push or pull request. You can easily set up workflows that include security scanning alongside your existing CI tasks. This ensures that any new code is checked for security flaws before it even reaches a staging environment.
Azure Pipelines
For teams in the Microsoft ecosystem, ZeroThreat offers a dedicated "AI DAST Scanner" extension available in the Azure DevOps Marketplace. This integration allows you to add security testing tasks directly to your agent jobs using a visual editor or YAML. It ensures that security checks are a fundamental part of your "Build, Test, and Deploy" chain.
AWS CodePipeline
ZeroThreat integrates with AWS CodePipeline and CodeBuild to provide automated security testing within your cloud workflows. By adding a buildspec.yml file to your project, you can orchestrate scans that run during the build or test stages. With this approach, you can customize and scale security processes that fit perfectly within AWS environments.
CircleCI
CircleCI users can integrate ZeroThreat scans to ensure their continuous integration process remains secure and efficient. The integration allows you to trigger AI-powered vulnerability assessments that align with your team's specific testing needs. By incorporating these checks into your CircleCI config, you gain immediate feedback on the security posture of your latest changes.
How to Integrate ZeroThreat in Your CI/CD Pipeline?
Now that you know the platforms ZeroThreat integrates with, let’s learn how to integrate ZeroThreat into your CI/CD pipeline. We’ll cover three key integrations including GitLab CI/CD, Azure Pipelines, and AWS CodePipeline, helping you embed shift-left security in your existing workflows.
1. Integrating ZeroThreat with GitLab CI/CD
ZeroThreat connects with GitLab CI/CD to help you automatically run deep security scans with every code update. This setup ensures you identify vulnerabilities early in the SDLC, keeping your production environment secure and stable.
Prerequisites
Before you begin the integration process, make sure you have the following in place:
- Verified Target: Your application or API target must be fully verified in the ZeroThreat portal.
- GitLab Access: You need an active GitLab project with CI/CD permissions enabled.
- Basic Knowledge: A general understanding of GitLab pipelines and the structure of .gitlab-ci.yml files is helpful.
- Professional Plan: Ensure you are on a ZeroThreat plan that includes CI/CD features, such as the Professional Plan.
Step 1: Start CI/CD Integration from ZeroThreat
The first step is to link your specific target to the GitLab environment to generate a unique security handshake.
- Navigate to Targets: Log in to the ZeroThreat portal and go to the Targets section.
- Access CI/CD Settings: Find the target you want to integrate and click the Continuous Integration button.
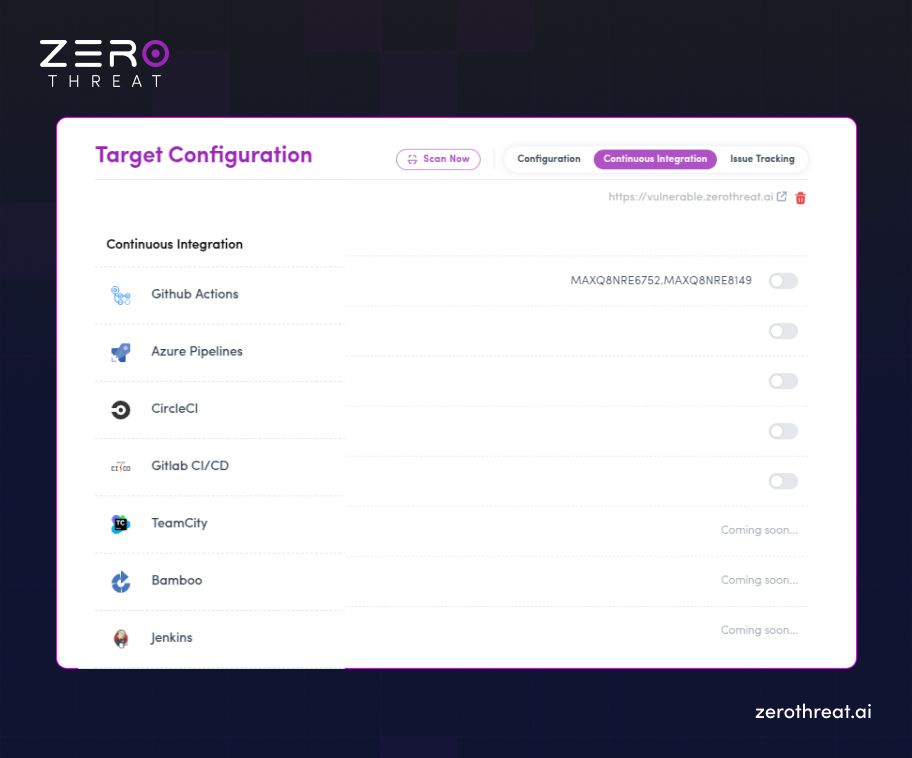
- Add GitLab Integration: In the settings drawer that appears, click to enable "GitLab CI/CD integration" and confirm.
- Generate Token: Once confirmed, a unique ZT_TOKEN will be generated; copy this for later use in Step 6.
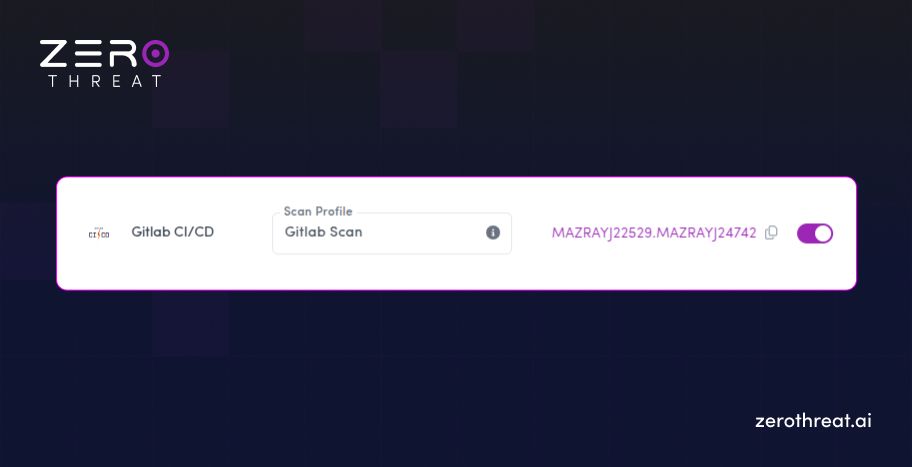
Step 2: Choose Scan Settings
You must define how ZeroThreat should interact with your application during the pipeline run.
- Select Scan Profile: Choose or create a Scan Profile suitable for your environment; this is mandatory for the pipeline to initiate.

- Configure Authentication: If your app has private areas, select the appropriate Login Template to ensure the scanner can test authenticated sections.
Step 3: Visit the GitLab CI/CD Catalog
ZeroThreat provides a pre-configured component in the GitLab Catalog to simplify the setup.
- Open Catalog: Click the GitLab CI/CD icon within ZeroThreat to be redirected to the GitLab CI/CD Catalog page.
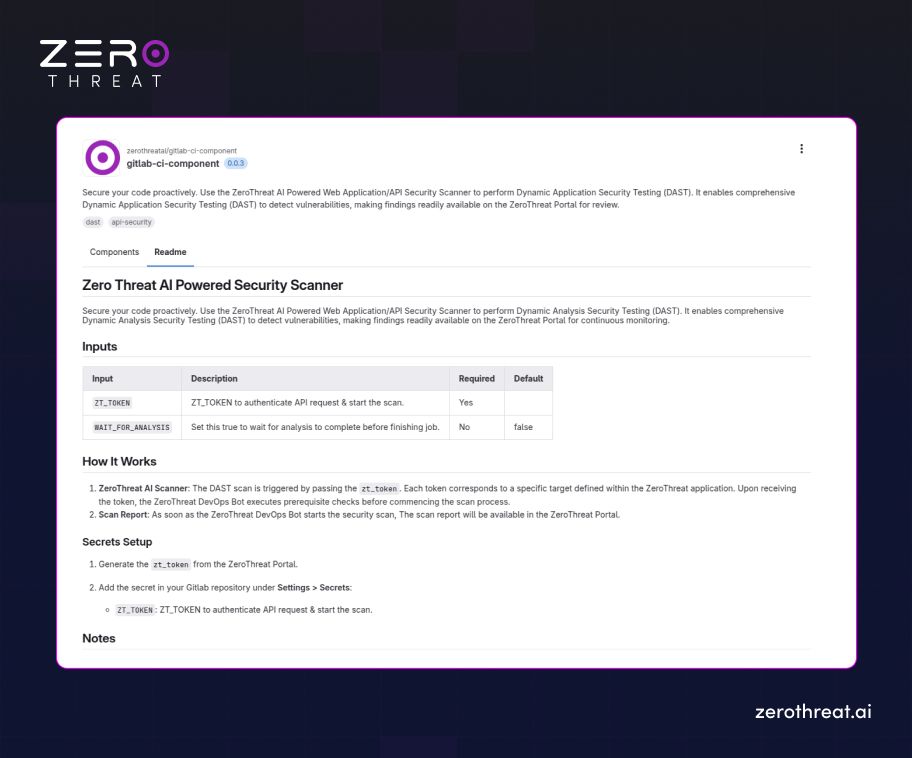
- Locate Configuration: Find the ZeroThreat integration details to see the specific version and configuration code required for your .gitlab-ci.yml file.
Step 4: Open Your GitLab Project and Start Editing
Now, you need to apply these settings to your actual GitLab repository.
- Go to Repository: Navigate to your project in GitLab and select Build → Pipeline Editor from the left sidebar.
- Access YAML File: This opens your .gitlab-ci.yml file, which is the core of your pipeline automation.
Step 5: Configure Your Pipeline
Add the ZeroThreat security stage and component call to your existing pipeline structure.
- Add Security Stage: In the stages: section of your YAML file, add a new stage named ZeroThreat AI Security Scan.
- Insert Component Code: Use the include keyword to call the ZeroThreat scanner component. It should look like this:
YAML
stages:
- build
- test
- deploy
- ZeroThreat AI Security Scan
[SNIP]
include:
- component: $CI_SERVER_FQDN/zerothreatai/gitlab-ci-component/scanner@0.0.3
inputs:
ZT_TOKEN: $ZT_TOKEN
WAIT_FOR_ANALYSIS: false
Note: Always ensure you are using the latest version of the zerothreatai/gitlab-ci-component (e.g., replace @0.0.3 with the current version shown in the catalog).
Step 6: Set ZT_TOKEN as a CI/CD Variable
For security, never hardcode your token in the YAML file. Use GitLab’s built-in secrets management.
- Navigate to Variables: In your GitLab project, go to Settings → CI/CD → Variables.

- Add Variable: Click Add Variable and enter ZT_TOKEN as the Key.
- Secure the Value: Paste your unique token into the Value field and ensure it is masked to keep it hidden from build logs.
Tip: Use GitLab CI/CD Variables to safely store secrets like ZT_TOKEN. This prevents sensitive data from being exposed in your version control.
Step 7: Run the Pipeline
With the configuration complete, you can now trigger the AI-powered automated scan.
- Commit Changes: Save and commit your updated .gitlab-ci.yml file to the repository.
- Monitor the Job: Start or rerun your pipeline; once it reaches the ZeroThreat AI Security Scan stage, it will automatically trigger a scan in the ZeroThreat portal.
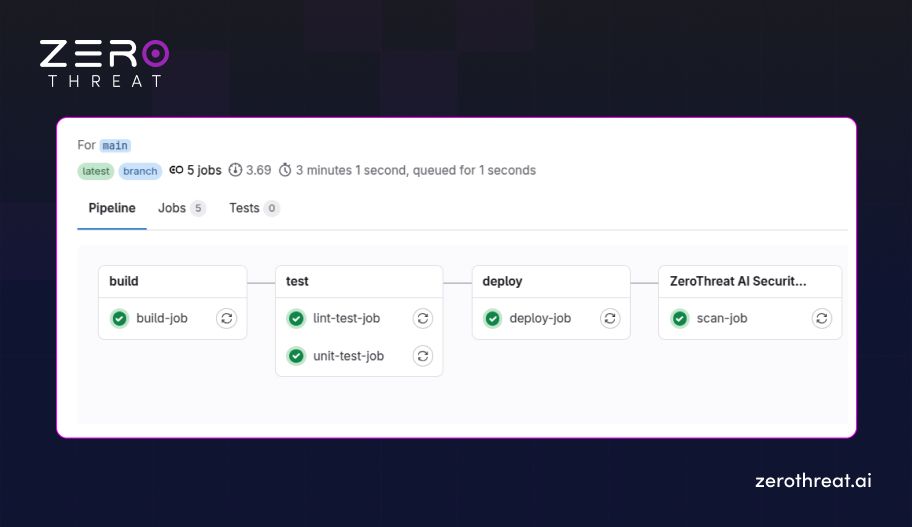
- Verify Execution: You can track the job's progress in real-time through both the GitLab job console and your ZeroThreat dashboard.
One breach can cost you millions. Invest in affordable protection that scales with you needs.
Compare Plans
2. Integrating ZeroThreat with Azure Pipelines
Integrating ZeroThreat with Azure Pipelines allows you to automate vulnerability scanning directly within your DevOps workflow. This setup catches security issues before they reach production, ensuring every release is consistently hardened and secure.
Prerequisites
Before you start the integration process, make sure you have the following in place:
- Verified Target: Your application or API target must already be verified within your ZeroThreat account.
- Azure DevOps Permissions: You need an active Azure DevOps project with sufficient permissions to manage and run pipelines.
- Connected Repository: Your source code (from GitHub, Bitbucket, or Azure Repos) must be connected to your Azure Pipeline.
- Basic Azure Knowledge: A general understanding of how Azure Pipelines and agent jobs work will help you navigate the setup.
Step 1: Enable Azure Integration in ZeroThreat
First, you must link your target to Azure DevOps to generate the necessary authorization.
- Access Targets: Navigate to the Targets section in the ZeroThreat dashboard.
- Open CI/CD Settings: Find the target you want to scan and click the Continuous Integration button.
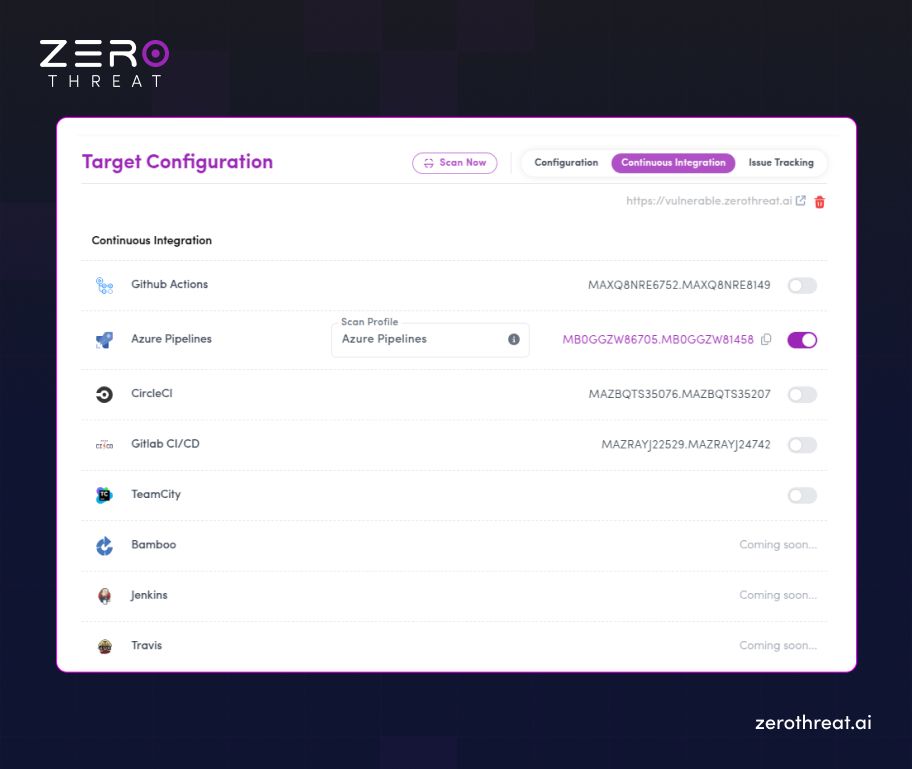
- Add Azure Integration: In the settings drawer, enable "Azure Pipelines integration" and confirm.
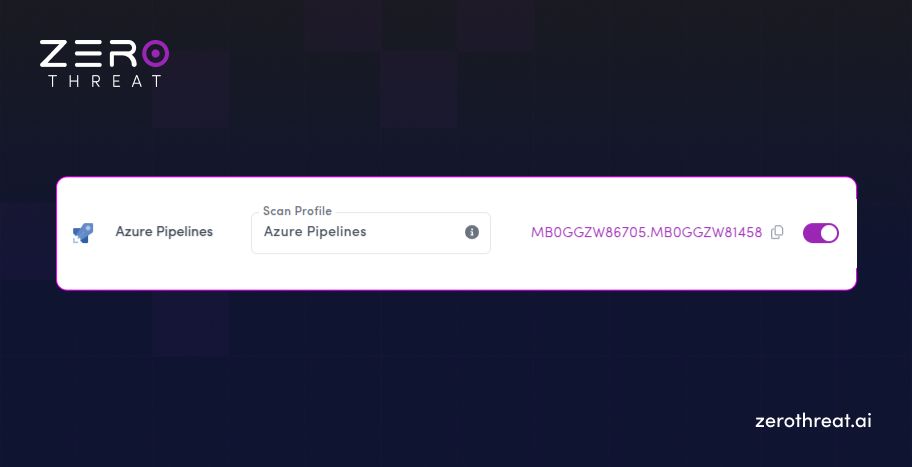
- Generate Token: A unique ZT_TOKEN will be generated; copy this for use in the final steps.
Step 2: Choose Scan Settings
Define the parameters for how ZeroThreat will crawl and test your application.
- Mandatory Scan Profile: Select or create a Scan Profile suited for your environment.
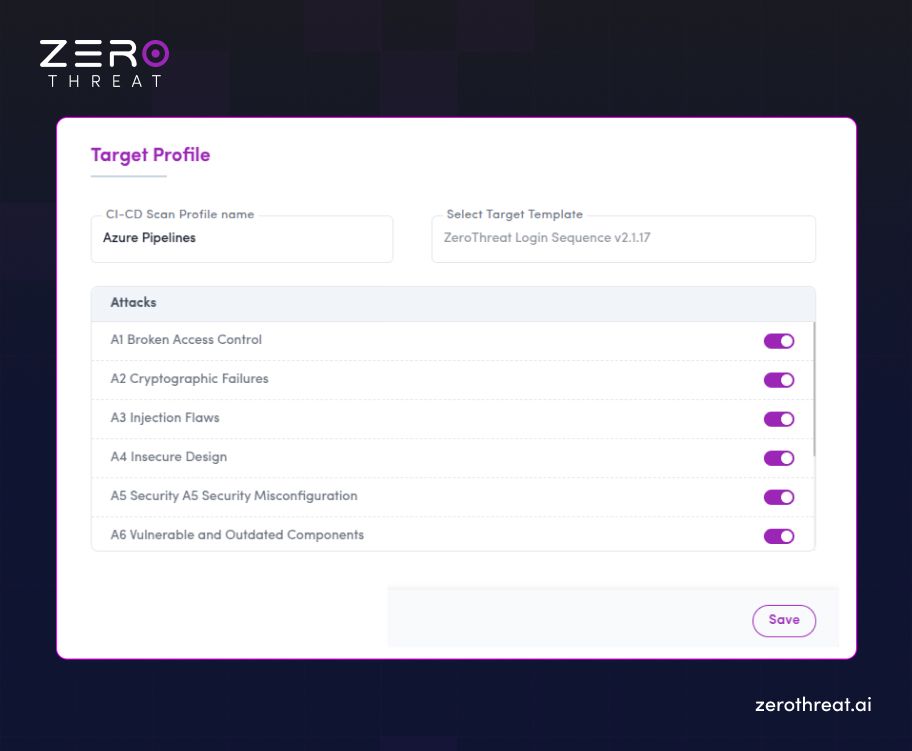
- Authenticated Scans: If your application requires a login, select a working Login Template to ensure the scanner can reach protected sections.
Step 3: Open the Azure Pipelines Marketplace
ZeroThreat provides a specialized extension to make the integration "point-and-click."
- Find the Extension: Go to the Azure DevOps Marketplace and search for ZeroThreat AI DAST Scanner.
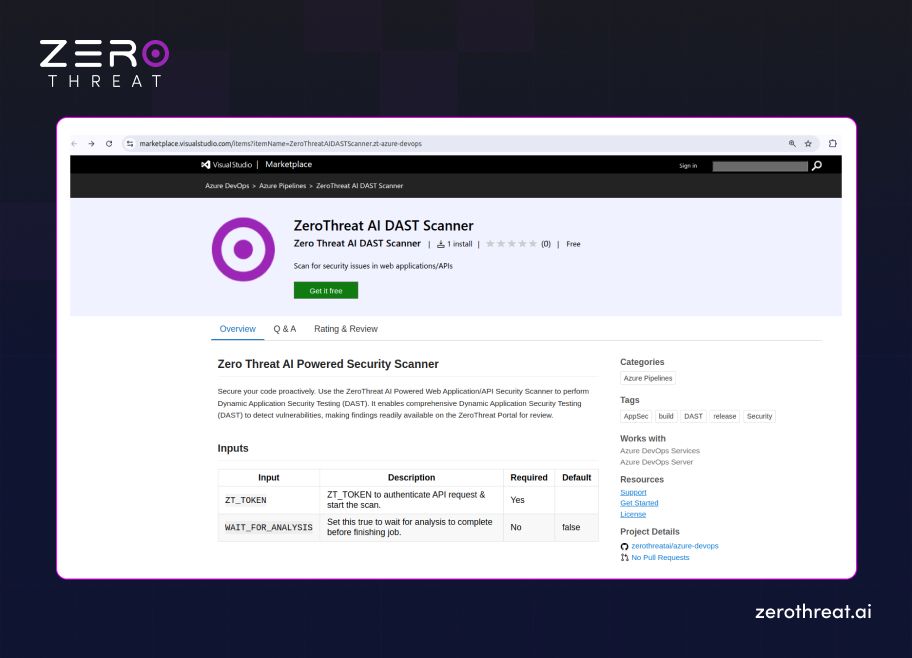
- Install: Click Get it free and follow the prompts to install it into your specific Azure DevOps organization.
Step 4: Create a Pipeline in Azure DevOps
Set up the environment where the security scan will be executed.
- Navigate to Pipelines: In your Azure DevOps project, go to Pipelines and click Create Pipeline.
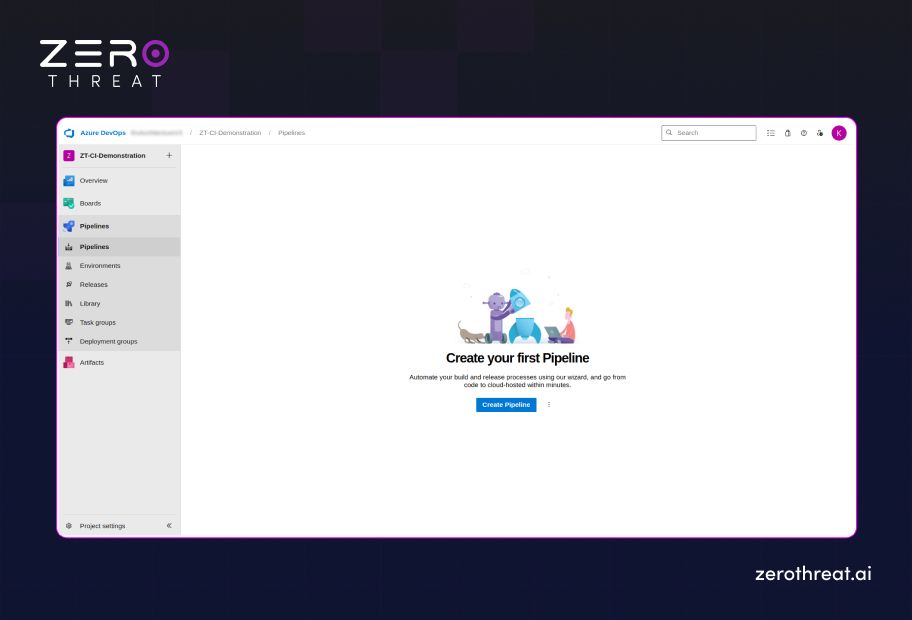
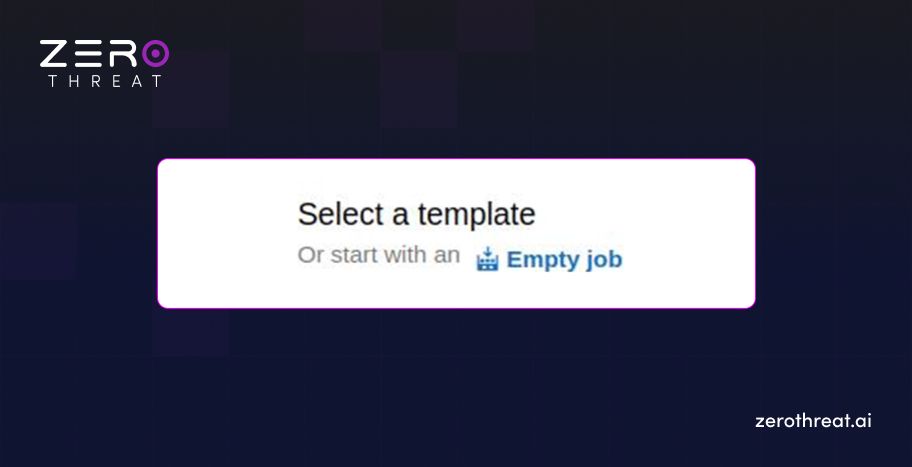
- Configure Connection: Choose your source code repository and select Starter Pipeline or click “Empty Job” to build from scratch.
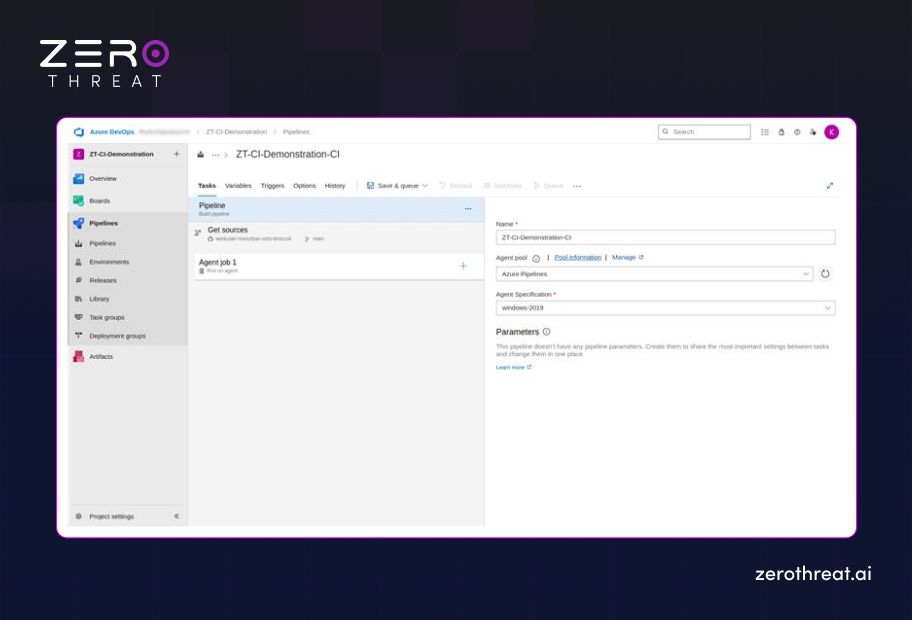
Step 5: Configure the Agent Job
Prepare the build agent to handle the security task.
- Open Editor: Access the pipeline editor and ensure you have an Agent Job configured to run on a supported image (like ubuntu-latest).
- Search for Task: In the task assistant pane on the right, search for "ZeroThreat" to find the installed extension.
Step 6: Add the ZeroThreat Scan Task
Input the specific variables that link your pipeline to the ZeroThreat engine.
- Assign Token: In the task configuration, enter your ZT_TOKEN. For security, it is best practice to store this as a secret variable in Azure DevOps and reference it here.
- Set Analysis Wait: Decide if you want the pipeline to wait for results:
- False (Default): The pipeline continues immediately after triggering the scan.
- True: The pipeline pauses and waits for the full security report before moving to the next stage.
Step 7: Run the Pipeline
Trigger the automation and monitor your security posture in real-time.
- Save and Queue: Click Save and Queue to commit your changes and start the build.
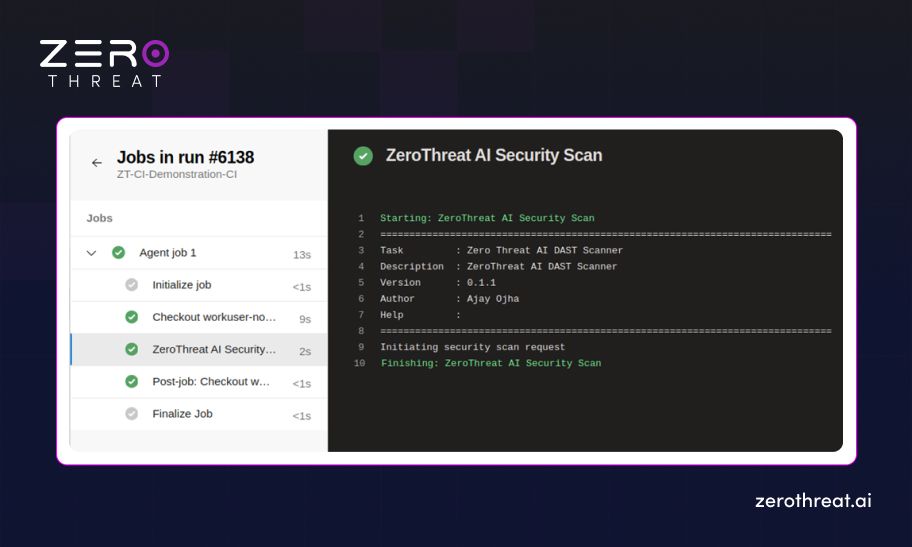
- Monitor Progress: You can view the scan status directly in the Azure Pipeline logs or watch the live crawl in your ZeroThreat Dashboard.
3. Integrating ZeroThreat with AWS CodePipeline
Integrating ZeroThreat with AWS CodePipeline allows you to run AI-driven automated security scans during your CI/CD process. This ensures that vulnerabilities are detected early and security checks are part of your build pipeline before deployment.
Prerequisites
Before you begin the integration process, make sure you have the following in place:
- Verified Target: Your application or API target must be verified in your ZeroThreat account.
- AWS Account: You must have access to an active AWS account.
- DevOps Knowledge: You should be familiar with the basics of AWS CodePipeline and CodeBuild.
- Professional Plan: You need to have the ZeroThreat Professional Plan.
Step 1: Enable AWS Integration in ZeroThreat
First, you need to authorize the connection between ZeroThreat and your AWS environment.
- Navigate to Targets: Log in to your ZeroThreat account and go to the Targets section.
- Open Integration Settings: Find the specific target you want to secure and click the Continuous Integration button.
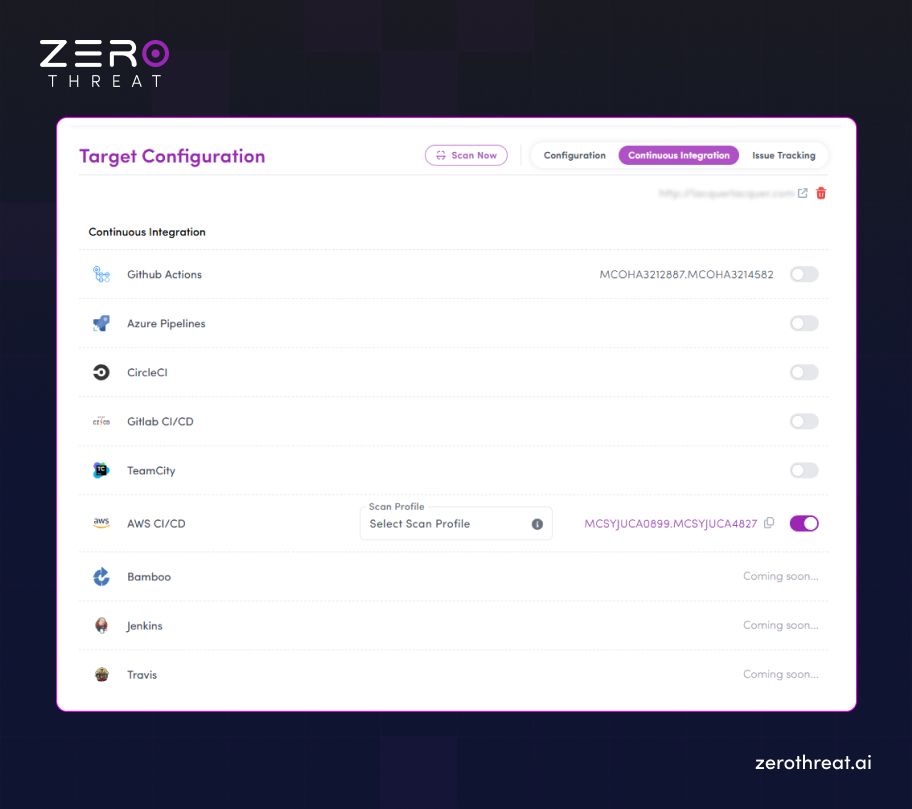
- Add AWS: Enable "AWS CI/CD integration" from the options and confirm your choice.
- Save Your Token: A unique ZT_TOKEN will be generated. Copy this immediately, as you will need it for your AWS environment variables later.
Step 2: Choose Scan Settings
You must tell the scanner exactly how to behave when the pipeline triggers it.
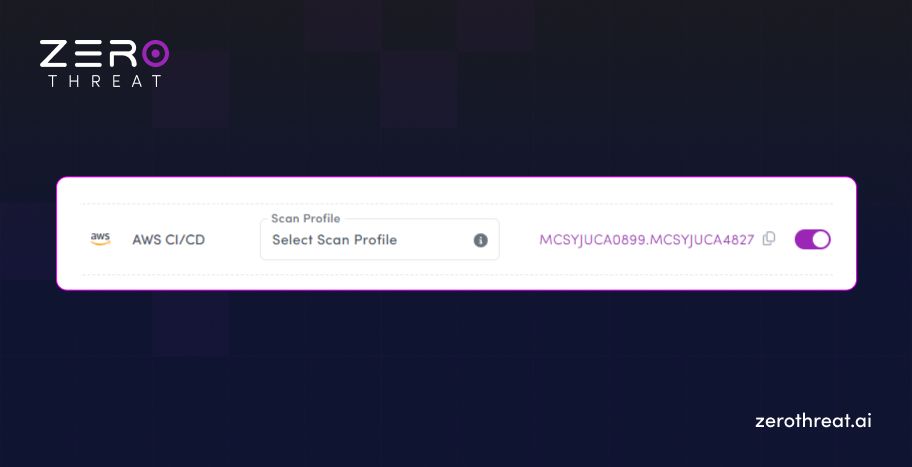
- Select a Scan Profile: Choose a predefined or custom Scan Profile. This is a mandatory step to initiate the scan.
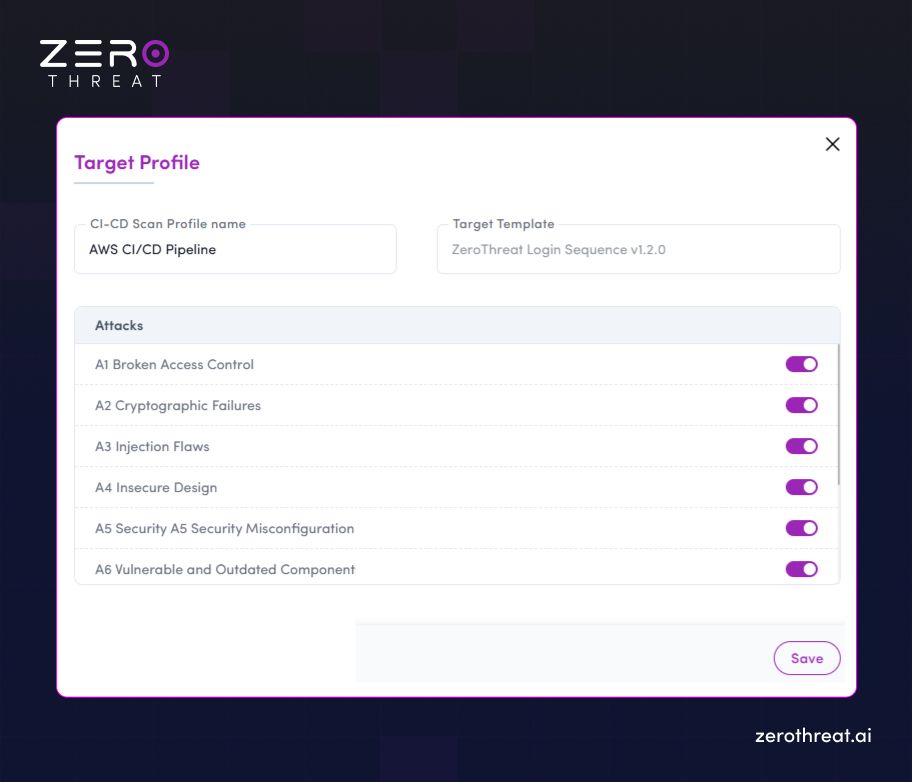
- Configure Authentication: If your application has a login wall, select the appropriate Login Template so the scanner can access and test protected pages.
Step 3: Add buildspec.yml to Your Project
AWS CodeBuild relies on a YAML file to know which commands to run during the build process.
- Create the File: In the root directory of your source code, create a file named buildspec.yml.
- Insert the Script: Add the following logic to trigger the ZeroThreat scan:
buildspec.yml
version: 0.2
phases: install: runtime-versions: python: 3.11 commands: - apt-get update && apt-get install -y curl jq
pre_build: commands: - | if [ -z "$ZT_TOKEN" ]; then echo "ZT_TOKEN input is required but not provided." exit 1 fi
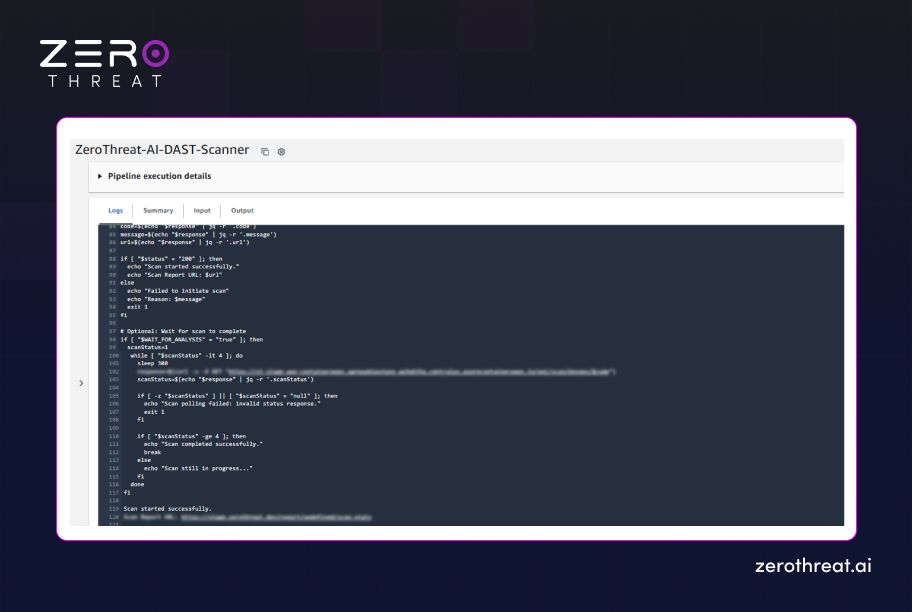
build: commands: - echo "Starting security scan..." - | response=$(curl -s -X POST https : // api . zerothreat . ai / api / scan / devops \ -H "Content-Type: application/json" \ -d '{"token":"'"${ZT_TOKEN}"'"}') status=$(echo "$response" | jq -r '.status') code=$(echo "$response" | jq -r '.code') message=$(echo "$response" | jq -r '.message') url=$(echo "$response" | jq -r '.url') if [ "$status" = "200" ]; then echo "Scan started successfully." echo "Scan Report URL: $url" else echo "Failed to initiate scan" echo "Reason: $message" exit 1 fi if [ "$WAIT_FOR_ANALYSIS" = "true" ]; then scanStatus=1 while [ "$scanStatus" -lt 4 ]; do sleep 300 response=$(curl -s -X GET "https: //api . zerothreat . ai/api/scan/devops/$code") scanStatus=$(echo "$response" | jq -r '.scanStatus') if [ -z "$scanStatus" ] || [ "$scanStatus" = "null" ]; then echo "Scan polling failed: invalid status response." exit 1 fi if [ "$scanStatus" -ge 4 ]; then echo "Scan completed successfully." break else echo "Scan still in progress..." fi done fi
artifacts: files: - "**/*"
- Commit the File: Save the changes and push the file to your repository (e.g., GitHub or AWS CodeCommit).
Step 4: Start Creating Your AWS Pipeline
Begin the setup within the AWS Console.
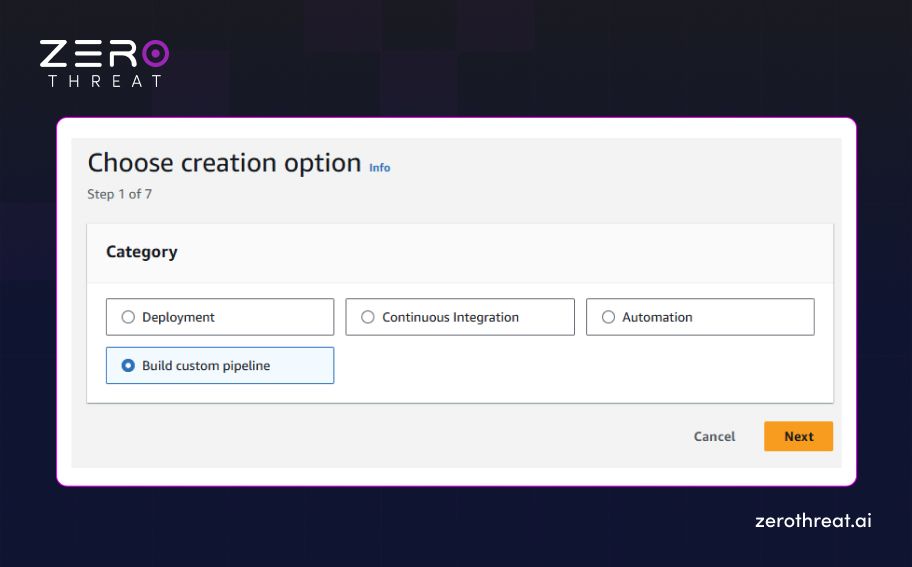
- Open CodePipeline: Navigate to AWS CodePipeline and click Create Pipeline.
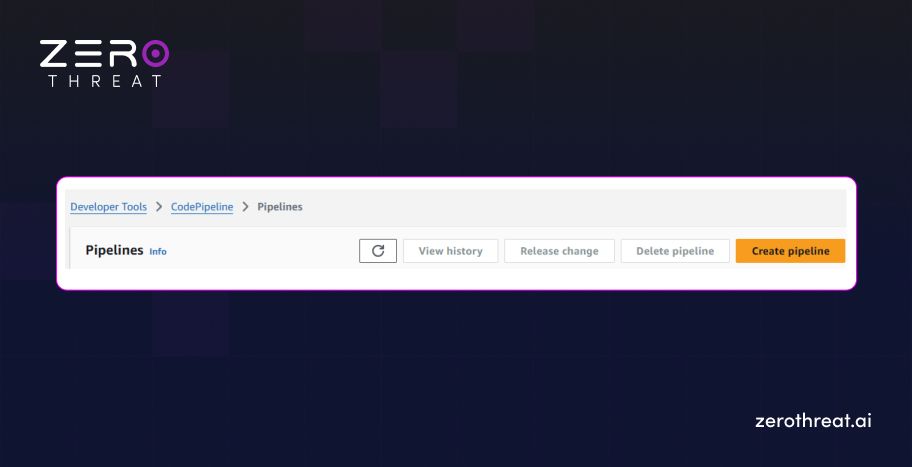
- General Settings: Choose Custom Pipeline, give it a unique name, and configure the service role as needed.
Step 5: Configure the Source Provider
Connect your code so the pipeline triggers on every update.
- Select Source: Under the Source Provider dropdown, select your code source (e.g., GitHub).
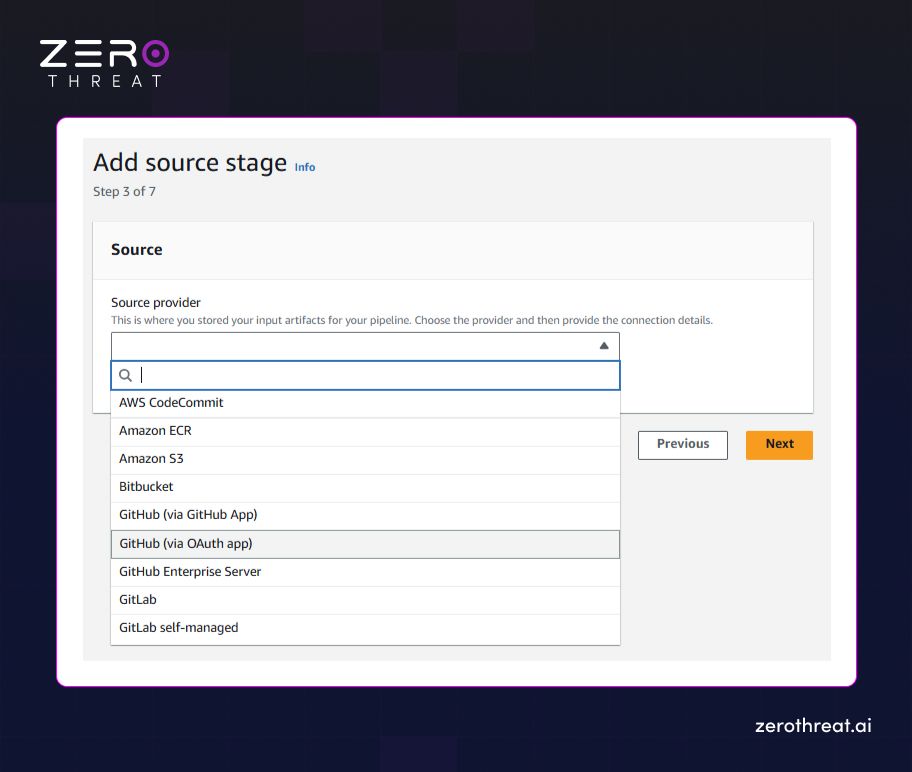
- Connect Account: Follow the prompts to authorize AWS to access your repository and select the correct branch.
Step 6: Set Up the Build Stage
Define the compute environment where the security command will run.
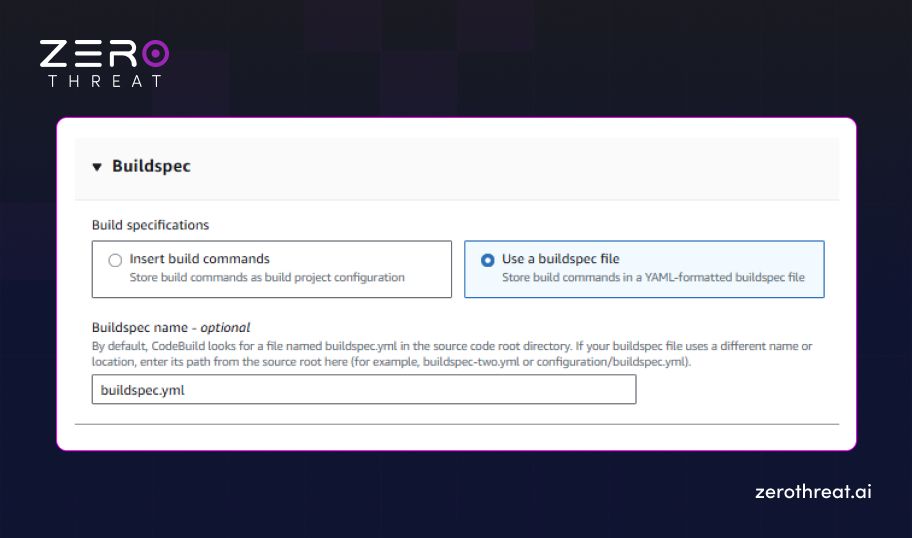
- Create Project: In the Build Stage, click Create a new project to open the CodeBuild setup.
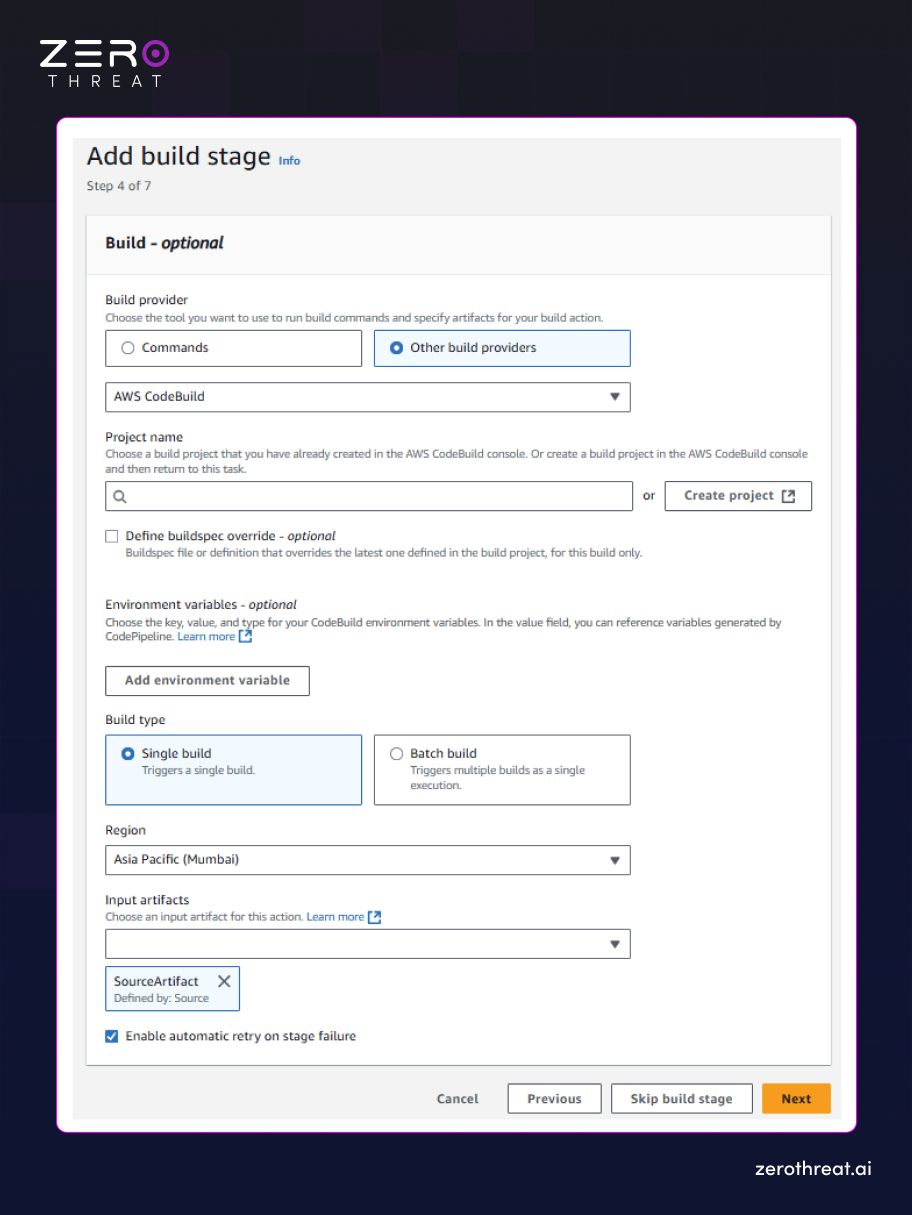
- Reference Buildspec: Under the Buildspec section, choose Use a buildspec file and ensure the name matches buildspec.yml.
Step 7: Configure Environment Variables
Securely pass your credentials to the build agent without hardcoding them.
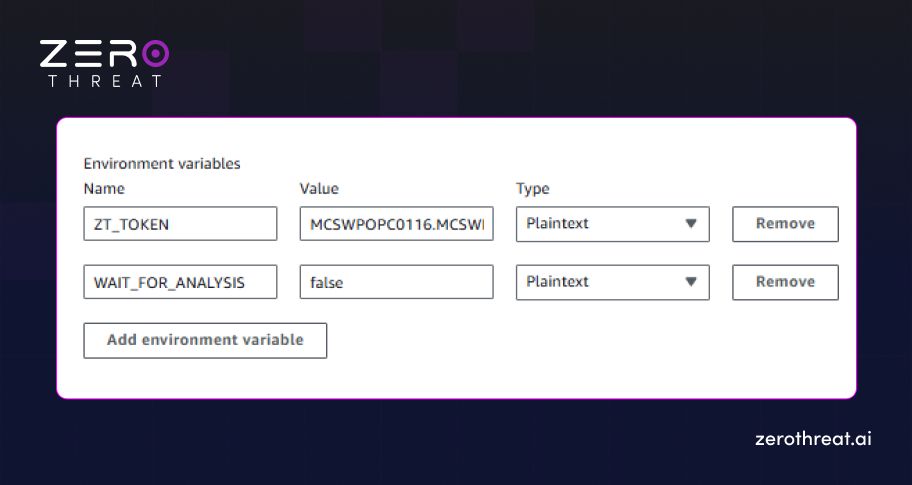
- Add ZT_TOKEN: In the Environment Variables section, add ZT_TOKEN and paste the token you copied in Step 1.
- Set Analysis Wait: Add a variable named WAIT_FOR_ANALYSIS and set it to true (to wait for results) or false (to run in the background).
Step 8: Finalize and Run
Complete the setup and initiate your first automated pentest.
- Complete Stages: Optionally add Test or Deploy stages to finish your workflow.
- Create Pipeline: Click Create Pipeline to save your settings.
- Automated Trigger: Once saved, the pipeline will run, and you can monitor the scan status directly in the ZeroThreat dashboard.
By following these steps for integrating ZeroThreat with GitLab, Azure, or AWS, you transform pentesting from a final process into a continuous, automated advantage. This shift-left approach ensures that every code update is hardened against threats before it ever reaches a live environment.
Struggling to integrate pentesting into CI/CD? Let ZeroThreat experts help. Connect Us
Wrapping Up
Shift-left security works best when security testing runs inside CI/CD pipelines, detecting vulnerabilities from the very start. Integrating pentesting early helps teams detect vulnerabilities sooner and maintain CI/CD pipeline security without disrupting developer workflows.
By embedding automated penetration testing into GitLab CI/CD, Azure Pipelines, and AWS CodePipeline, teams align security with DevSecOps practices. Intelligent testing with agentic AI penetration testing capabilities keeps pace with frequent releases that traditional tools can’t. This approach makes security consistent, scalable, and practical for modern engineering teams.
ZeroThreat’s AI-driven penetration testing tool supports this shift by integrating easily into existing CI/CD workflows. It enables continuous penetration testing from code to deployment, allowing teams to gain visibility into risks, ship faster, and build secure applications.
Frequently Asked Questions
How does integrating pentesting directly into CI/CD pipelines improve overall software delivery speed?
Integrating pentesting into CI/CD pipelines accelerates delivery by identifying vulnerabilities early in the SDLC, preventing late-stage security bottlenecks that delay releases. This proactive "shift-left" approach ensures security checks keep pace with automated builds, allowing for rapid remediation before code reaches production.
Can pentesting really be shifted left, or does it still require manual intervention outside the pipeline?
How does ZeroThreat prevent security testing from slowing down our CI/CD pipeline?
How does ZeroThreat integrate with existing CI/CD tools like GitHub Actions, GitLab, Jenkins, and Azure DevOps?
Is shift-left pentesting suitable for high-velocity engineering teams working on microservices or frequent deployments?
Why should organizations adopt shift-left pentesting instead of relying solely on pre-release security reviews?


Explore ZeroThreat
Automate security testing, save time, and avoid the pitfalls of manual work with ZeroThreat.